 how-to
How to Use FAA Weather Resources for Flight Planning
Last Updated: November 6, 2026
Quick Summary
Using FAA weather resources for flight planning means combining the FAA's textual products, such as METARs, TAFs, PIREPs and winds aloft, with its graphical products, including NEXRAD radar, ceiling and visibility maps and prognostic charts. Request a standard briefing through an official FAA source, then use graphics to see the shape of the weather and text to measure it.
- A METAR is a routine observation of current conditions; a TAF forecasts the next 24 to 30 hours.
- A standard briefing covers adverse conditions, synopsis, current conditions, en route and destination forecasts, winds aloft and notices.
- Pull winds aloft at your planned altitude plus one flight level above and below.
- When products conflict, plan for the worse outcome rather than siding with the optimistic forecast.
- Re-brief if departure slips more than an hour or a new Convective SIGMET or AIRMET appears.
Table of Contents
- Sources of Weather Data for Flight Planning: What the FAA Provides
- Step-by-Step: How to Pull an Aviation Weather Briefing
- Step 1: Define Your Route, Altitude, and Departure Window
- Step 2: Request a Standard Briefing Through an FAA Source
- Step 3: Read the Adverse Conditions and Synopsis First
- Step 4: Pull Current Observations Along the Route
- Step 5: Compare the TAFs Against the Observations
- Step 6: Layer in Winds Aloft and Temperature
- Step 7: Review Radar, Ceiling and Visibility, and Prognostic Charts
- Step 8: Check Notices and File
- METAR and TAF Flight Planning: Reading the Core Observations and Forecasts
- Weather Briefing Checklist: What to Review Before Every Departure
- Aviation Weather Briefing Guide: Interpreting Conflicting and Time-Sensitive Products
- VFR and IFR Workflows: Tailoring FAA Weather Resources to Your Flight
- Weather Hazards and Decision Thresholds for Go/No-Go Calls
- In-Flight Updates and Diversion Planning with FAA Weather Resources
- Frequently Asked Questions
Sources of Weather Data for Flight Planning: What the FAA Provides
Using FAA weather resources for flight planning starts with knowing which products exist and what each tells you. The FAA publishes two families: textual products that state conditions in coded language, and graphical products that show them as pictures.
Dispatcher candidates need fluency in both, because the ADX exam and the job demand it. Text-only readers miss spatial patterns; graphics-only readers miss precise numbers.
Textual Products: METARs, TAFs, PIREPs, and Winds Aloft
Text products give you exact values at exact times. A METAR is a routine observation of current conditions at an airport (AWC Product Info). A TAF is a terminal aerodrome forecast covering the next 24 to 30 hours. PIREPs are pilot reports of actual conditions aloft, including turbulence and icing.
These four cover most of what you need before filing: ceiling, visibility, wind, and temperature.
Graphical Products: Radar, Ceiling and Visibility, and Prognostic Charts
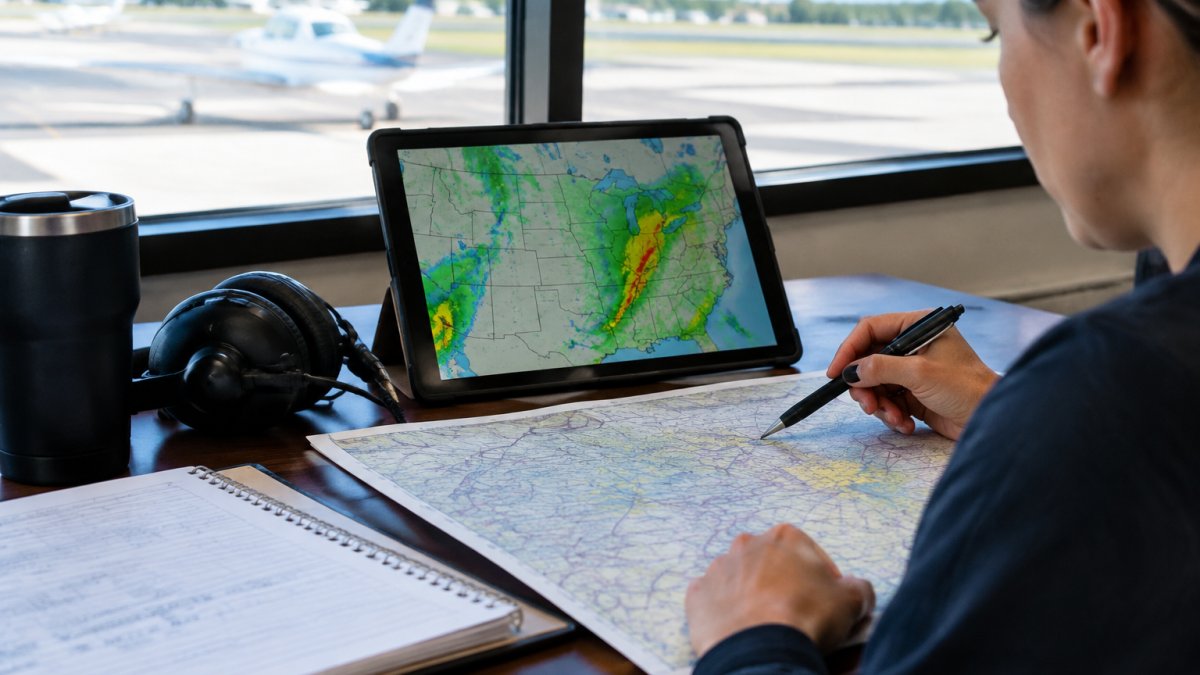
Graphics show you where weather sits and where it is heading. NEXRAD radar imagery displays precipitation intensity in near real-time.
The FAA's aviation weather guidance explains how these products fit together. A useful rule of thumb: use graphics to see the shape of the problem, then use text to measure it.
Step-by-Step: How to Pull an Aviation Weather Briefing
A standard briefing follows a fixed sequence, and skipping steps is how gaps creep into a flight plan.

Step 1: Define Your Route, Altitude, and Departure Window
You cannot brief weather without a route. Write down your departure point, destination, alternate, planned altitude, and departure window, every later step depends on these. Add a second alternate if the destination forecast is marginal, and note your true airspeed to convert winds aloft into groundspeed and fuel burn.
Step 2: Request a Standard Briefing Through an FAA Source
A standard briefing covers adverse conditions, the synopsis, current conditions, en route forecasts, destination forecasts, winds aloft, and notices. Request it through an official FAA source and record the time, a briefing is only valid for the moment you received it. The Aviation Weather Center at aviationweather.gov and Flight Service briefers both deliver standard briefings; a briefer can answer follow-up questions, while automated products give you raw data to interpret yourself.
Step 3: Read the Adverse Conditions and Synopsis First
Before you look at your destination, scan the adverse conditions section and synopsis, where AIRMETs, SIGMETs, Convective SIGMETs, and the location of fronts and pressure systems appear. If a Convective SIGMET covers your route, the rest of the briefing is about avoidance, not whether to go.
Step 4: Pull Current Observations Along the Route
Collect METARs at departure, destination, each alternate, and any airports that give you a mid-point picture. Note the observation time on each, a METAR is typically issued hourly, but a remote or part-time station may be older. Compare the dewpoint spread: a small spread with falling temperatures overnight signals fog risk a TAF may not capture.
Step 5: Compare the TAFs Against the Observations
Read each TAF's valid period, then its forecast groups. If the first forecast group disagrees with the current METAR, the forecast is already behind reality and you should weight the observation more heavily. Watch TEMPO and BECMG groups, which flag temporary or gradual changes that matter for arrival timing and alternate selection.
Step 6: Layer in Winds Aloft and Temperature
Pull winds aloft at your planned altitude plus one flight level above and below, convert the wind to groundspeed, and recompute fuel burn and time en route. Temperature aloft affects true airspeed and shows where freezing levels sit, feeding directly into icing risk on an IFR plan.
Step 7: Review Radar, Ceiling and Visibility, and Prognostic Charts
Loop the NEXRAD radar to see motion and trend, check the ceiling and visibility product for regional flight categories, and read prognostic charts to see where fronts and precipitation are forecast at your arrival time. When graphic and text agree, you have a coherent picture; when they disagree, move to the conflict-resolution method below.
Step 8: Check Notices and File
Review notices affecting your route and alternates, confirm your fuel and alternate plan against the worst forecast condition, and file. If you are weighing software for that final filing step, our guide to choosing flight planning software covers what dispatchers should look for.
Watch out: the most common workflow failure is treating the briefing as a one-time event. A briefing pulled two hours before departure and never refreshed is a plan built on stale data.
METAR and TAF Flight Planning: Reading the Core Observations and Forecasts
METAR and TAF flight planning comes down to reading two coded strings correctly and knowing which to trust more at any moment. The METAR tells you what is happening; the TAF tells you what is likely to happen. Treat the METAR as fact and the TAF as probability.
Read a METAR in this order:
- Wind direction and speed, including gusts
- Visibility
- Ceiling and cloud layers
For a TAF, scan the valid period first, then the forecast groups. Watch for temporary and becoming groups, because they signal conditions that matter to alternate planning.
If decoding these strings still feels slow, our walkthrough on reading aviation weather reports accurately breaks the format down line by line.
Weather Briefing Checklist: What to Review Before Every Departure
A weather briefing checklist keeps you from briefing by memory, which is where experienced pilots and dispatchers get complacent. Run the same list every time.
- Adverse conditions and warnings for the route
- Synopsis and location of fronts and pressure systems
- Current METARs at departure, destination, and alternate
That last item matters more than most checklists admit. Our guide on calculating fuel reserves for long haul flights pairs well with this list.
Aviation Weather Briefing Guide: Interpreting Conflicting and Time-Sensitive Products
An aviation weather briefing guide earns its keep when products disagree. A TAF calling for clear skies while radar shows a line of storms approaching is not a contradiction to ignore. Reconciling those signals also sharpens severe weather preparation, because the timing of a storm matters as much as its presence.
Understand What Each Product Actually Represents
Every FAA weather product sits somewhere between observation and forecast. A METAR observes conditions at a point in the recent past. A PIREP is an observation aloft, but a snapshot from one aircraft that may be an hour old. A TAF is a forecast with inherent uncertainty.
Check Issue and Valid Times Before You Compare
The first move in any conflict is to compare timestamps, not values. A TAF issued six hours ago may already be superseded by a newer issuance or an amendment; a METAR from a part-time station may be hours old; a radar loop that ends an hour ago is not current.
Apply Three Reconciliation Tests
When two current products disagree, work through three tests in order:
- Observation versus forecast. An observation beats a forecast for conditions that have already occurred. If the METAR shows a ceiling below your minimum but the TAF forecasts improvement, the METAR describes the present and the TAF describes a possibility.
- Smaller area versus larger area. A terminal forecast for your destination is more specific than a regional prognostic chart. When they conflict, the local product usually carries more weight for that airport, but the regional chart may reveal a system the local forecast has not yet captured.
- Newer versus older. A more recent issuance generally reflects more current model data. An amended TAF supersedes the original.
When a conflict survives all three tests, plan for the worse outcome. The cost of an unnecessary delay is small compared with the cost of launching into conditions you did not plan for.
Account for Forecast Uncertainty and Product Age
Forecasts degrade with time. A TAF's confidence is highest in the first few hours of its valid period and lowest near the end; a prognostic chart for 24 hours out is a planning tool, not a decision tool. Treat long-range forecasts as trend information and short-range observations and terminal forecasts as decision information.
Work Through a Reconciliation Example
Suppose your destination TAF, issued two hours ago, forecasts six miles visibility and a 4,000-foot ceiling through your arrival window, but the current METAR shows two miles and 800 feet with fog. Radar shows no precipitation, which does not explain the fog because fog does not appear on precipitation radar. Applying the tests: the METAR is an observation and beats the forecast, and it describes the present.
Re-Brief When Conditions Change
Time sensitivity is the other trap: a briefing is a snapshot, and a TAF issued six hours ago may already be superseded. Always check issue times, and re-brief if departure slips or a new AIRMET, SIGMET, or Convective SIGMET appears. Our guide on studying aircraft dispatcher meteorology goes deeper into the underlying science.
Watch out: the most dangerous conflict is the one where the forecast is more optimistic than the observation and you side with the forecast because it matches what you want to do.
VFR and IFR Workflows: Tailoring FAA Weather Resources to Your Flight
VFR and IFR pilots need the same data but weight it differently. A VFR flight lives or dies on ceiling and visibility.
| Flight Type | Priority Products | Decision Driver |
|---|---|---|
| VFR | Ceiling/visibility maps, METARs, radar | Can I stay clear of clouds legally and safely? |
| IFR | TAFs, icing forecasts, winds aloft, alternates | Can I shoot an approach and have a way out? |
For VFR, build in a personal margin above legal minimums. For IFR, brief the alternate first, not last. If the alternate is questionable, the whole plan is questionable.
Weather Hazards and Decision Thresholds for Go/No-Go Calls
Weather hazards and decision thresholds should be written down before you are tired, rushed, or emotionally invested in a trip. A go/no-go decision made in the moment invites wishful thinking.
Set thresholds in advance:
- Thunderstorms: no dispatch into an area of embedded or forecast convection without a clear avoidance plan
- Icing: no flight into known icing conditions without certified protection and an escape route
- Turbulence: severe or extreme reports on route mean a new altitude or a new route
Watch out: the most dangerous condition is a forecast that sits just above your threshold. It invites a "probably fine" decision.
In-Flight Updates and Diversion Planning with FAA Weather Resources
In-flight weather monitoring turns a plan into a living document. En route, you track real-time weather against your forecast and decide when a deviation stops being optional.
Build the diversion plan before departure:
- Identify two alternates along the route, not just at the destination
- Note the weather trend at each alternate
- Set a decision point before each alternate where you must commit
Dispatchers do this continuously as a core part of the daily routine. Our breakdown of the daily responsibilities of an airline flight dispatcher shows how weather monitoring fits into a full shift.
Reading FAA weather resources well is a skill built through repetition, not memorization.
Frequently Asked Questions
Which FAA weather resources should pilots use before a flight?
Start with the FAA's Aviation Weather Center for METARs, TAFs, PIREPs, and graphical products like radar and ceiling/visibility charts. Use the Aviation Weather Handbook as your reference for interpreting those products. For a formal briefing, call or use an approved weather briefing service. Cross-check at least one textual product and one graphical product for each route segment, and confirm the observation and forecast valid times so you know how current the data is.
How do METARs and TAFs help with METAR and TAF flight planning?
METARs give you current observed conditions at departure, destination, and alternate airports, including ceiling, visibility, wind, and precipitation. TAFs give the forecast for the same airports, usually covering a 24 to 30 hour window. Together they let you compare what is happening now against what is expected at your arrival time. If the TAF shows conditions dropping below your personal minimums near your ETA, adjust your departure window, route, or alternate before you file.
What should a pilot include in a weather briefing checklist?
A practical weather briefing checklist covers: adverse conditions along the route, VFR cloud clearance and visibility if flying VFR, winds and temperatures aloft for altitude selection, alternate airports and their forecasts, NOTAMs that affect weather-dependent decisions, and a plan for in-flight updates. Note the valid time of each product you review. If any item on the checklist is missing or outdated, request an updated briefing before departure rather than relying on memory.
How should pilots evaluate changing weather along a route?
Compare the forecast trend across your route and departure window, not just a single snapshot. Look at whether ceilings and visibility are improving or deteriorating, where thunderstorms or icing are forecast to develop, and how winds aloft will affect your fuel and time. Set decision thresholds in advance, such as a minimum ceiling and visibility at your destination and alternate, and identify diversion airports along the route. If the trend crosses a threshold, make the go/no-go or diversion decision early rather than waiting until you are committed.